|
1
|
- By Steve Wallace
- ODIN International, Inc.
- THOR Tarp Division
|
|
2
|
|
|
3
|
- THOR Tarp has developed the ThoroShield® Tamper-Evident Curtain for the
express purpose of securing mail in the front of a trailer while
allowing for cargo to be placed in the rear of the trailer during shared
transport. Once the ThoroShield®
curtain is installed in a given trailer there is no need to remove
it. When not in use it simply
fastens to the E-track on the driver side wall and with its narrow
profile of 1.5” deep it does not sacrifice any hauling capacities. When needed it will install anywhere
along the entire length of the trailer depending on the % utilization or
load rate of the mail. For
example if running a 52’ trailer that has the front 8’ filled with mail
the curtain may then be installed across the width of the trailer once
the predetermined set-back is allowed for.
- THOR Tarp offers ThoroShield® tamper evident curtains to mail
contractors in (3) different widths all of which are adjustable in
height from 92” to 113”.
|
|
4
|
- It is necessary for the contractor to determine the interior width of
each trailer before ordering. The
Small Black curtain (part# 83-6-04S) is designed to fit trailers with an
actual inside width of less than 93”.
The Medium Gray curtain (part# 83-6-04M) is designed to fit
interior widths ranging from 93” to less than 97” and the Large Blue
curtain (part# 83-6-04L) fits all trailers 97” or wider inside.
- Prior to shipping these curtains can and should be marked with any/all
of the following information (to be provided by the contractor): 1.
trailer number, 2. route number, & 3. trip number.
|
|
5
|
- These ThoroShield® curtains are shipped broken down and DO require
assembly prior to installation.
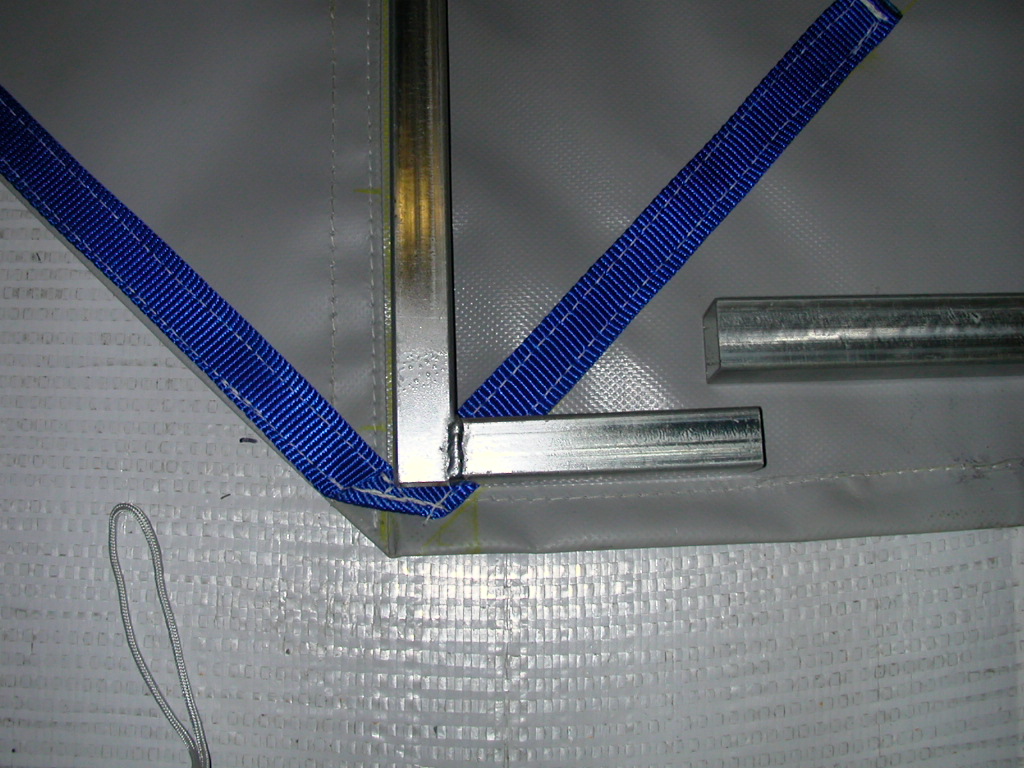
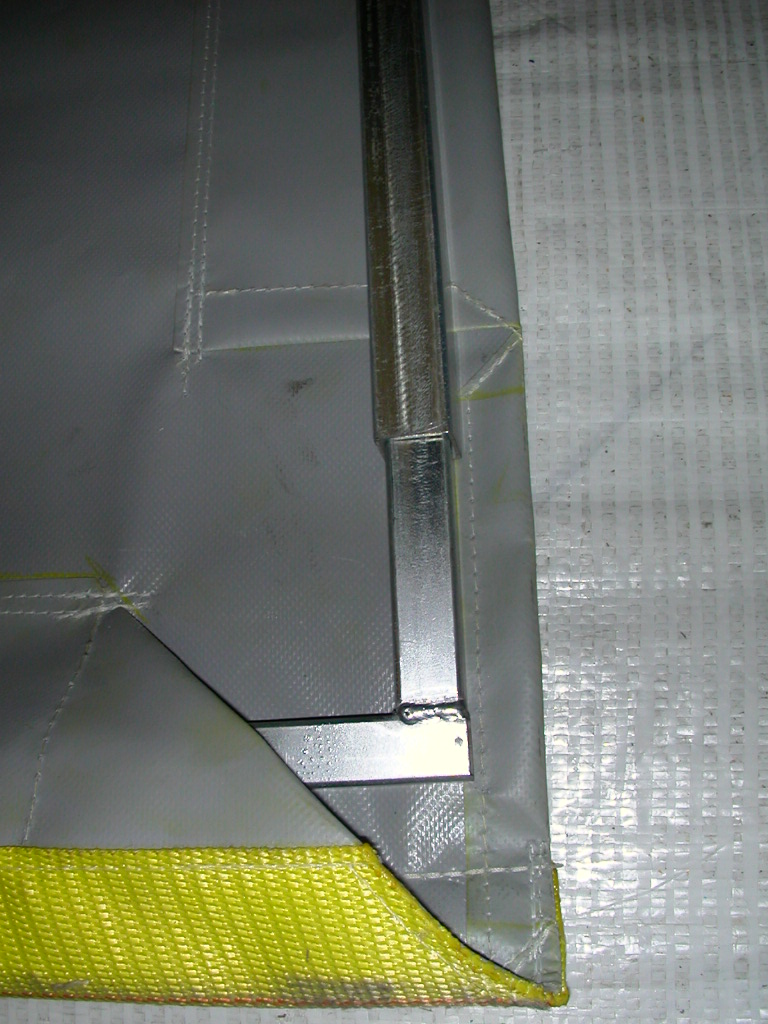
The metal frame consists of .813” and 1.0” galvanized steel
square stock sections that must be slid into each other until a complete
“circle” of steel is assembled into a rectangular shape. By “circle” we mean that if you start
in the lower right corner and move counterclockwise around the frame you
will find the sections alternate from .813 to 1.0 to .813 to 1.0, etc.
until the frame is complete.
|
|
6
|
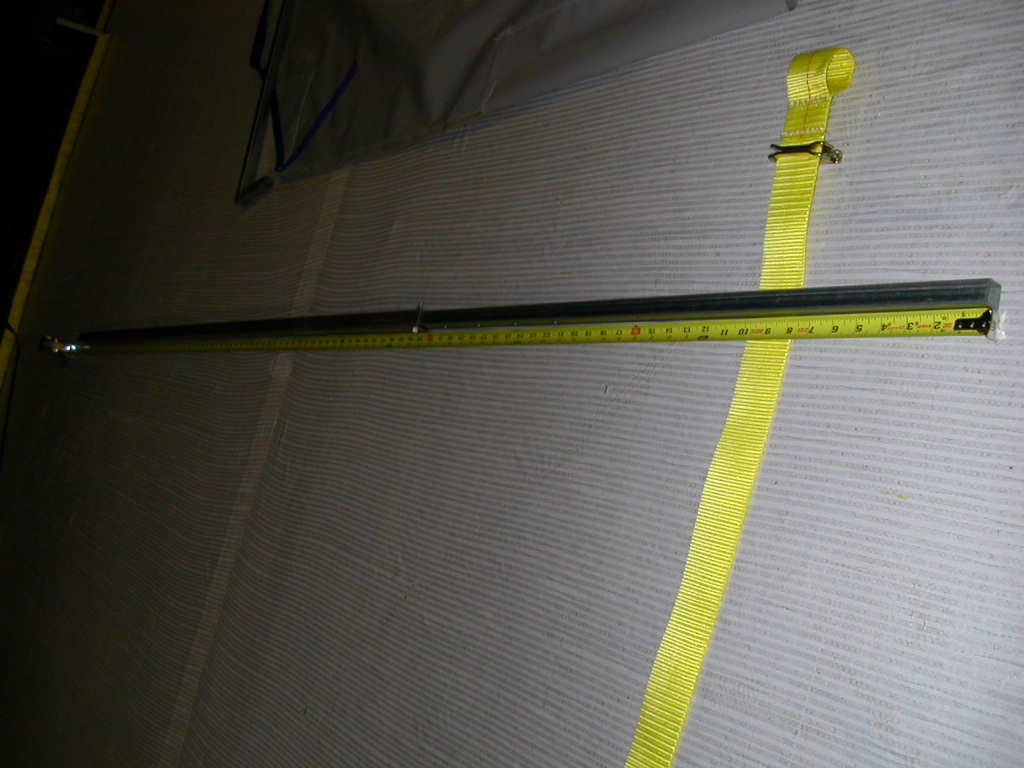
- Prior to any assembly the interior height of the trailer must be
determined. Once that height is
know, the (2) telescoping vertical frame members must be set to
approximately 3” less that that interior height. These vertical tubes
are adjustable in 3” increments by sliding apart to the proper length
then inserting the bolt, lock washer and wing nut provided through the
pre-drilled holes in both pieces.
When installing these vertical tubes into the curtain by sliding
them into the (2) pipe pockets provided care must be taken that the
wingnuts face the center of the curtain so that they do not abrade the
curtain over time through repetitive use.
|
|
7
|
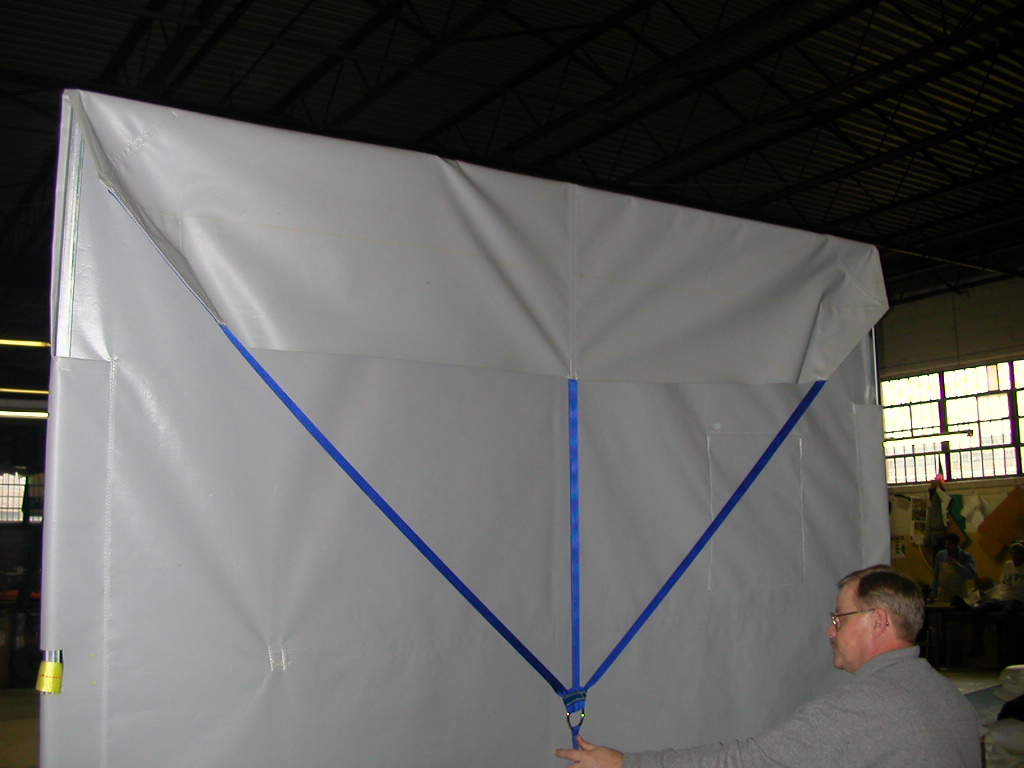
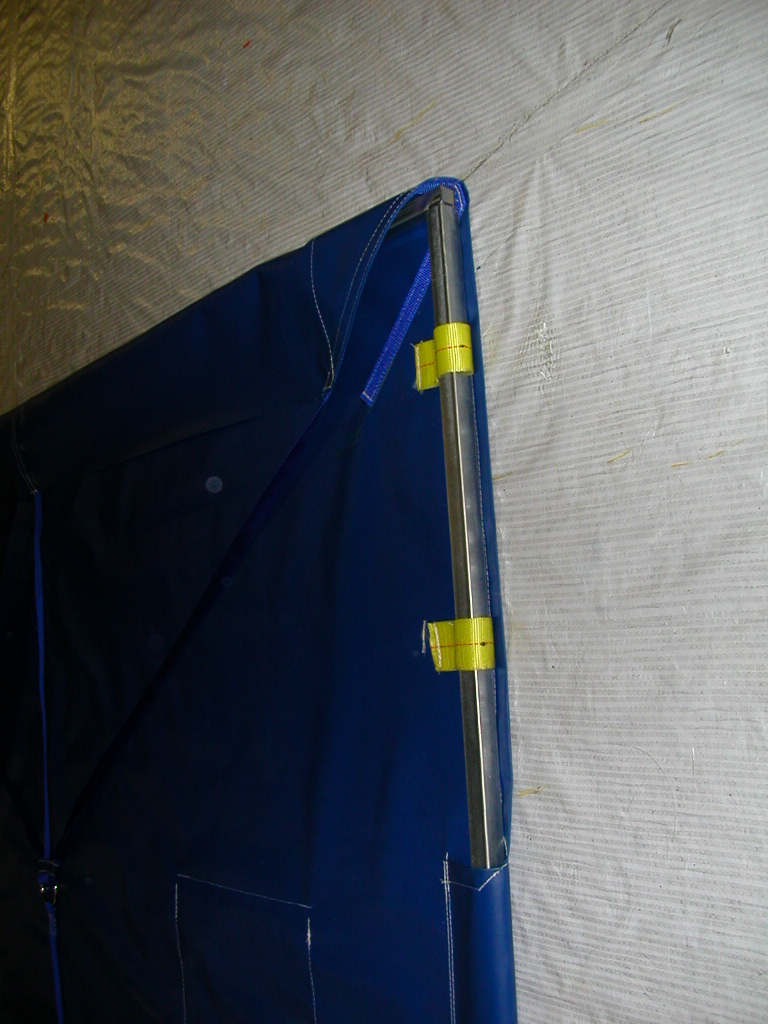
- When installed in the trailer properly the unitizing strap harness faces
the front of the trailer and is not visible when entering the rear of
the trailer. When the curtain is
set to one of its lower heights the additional yellow webbing loops are
not used.
|
|
8
|
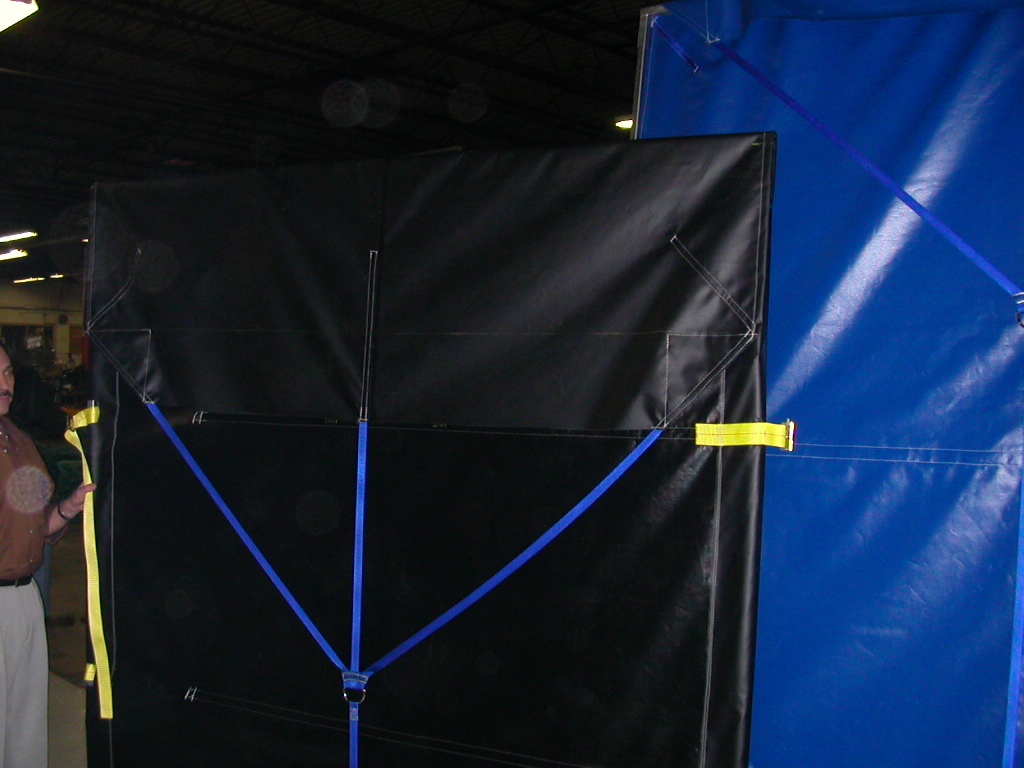
- When set to a mid range or taller height one or both of the yellow
webbing loops must be used when inserting the vertical tube members so
that curtain cannot be slid sideways on the horizontal frame member at
the top.
|
|
9
|
|
|
10
|
- To allow for the hundreds of different trailer configurations regardless
of manufacturer, these curtains have been designed to adjust on their
height prior to installation in the trailer. All of this adjustment occurs at the
top of the curtain so that the E-clips and their horizontal cargo straps
are never affected. The Load
Restraint System Specifications of the US Postal Service require that
your E-Tracks are installed 28.5” and 62.5” on center off the floor and
when viewing the erect curtain you will note that these distances are
where our E-clip assemblies are located.
The curtain is made secure across the width of the trailer by first
inserting the driver’s side E-clips into the 2 respective tracks, then
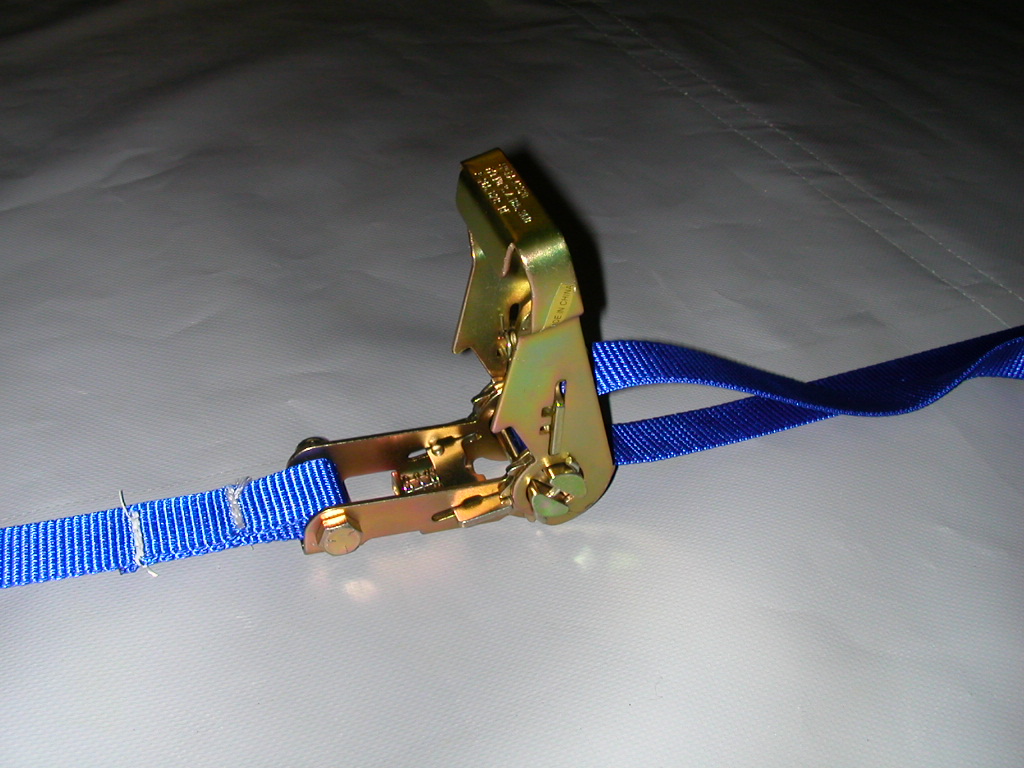
inserting the curbside E-clips, then ratcheting tight. The curtain is then made tamper
evident by placing USPS tamper evident seals through both ratchet
handles and the brass grommets provided in the cargo straps the handles
are attached to.
|
|
11
|
|
|
12
|
- Remove curtain from its storage and carrying bag. Unroll curtain so that the side with
the (2) large ratchets and horizontal straps is face down on the floor.
|
|
13
|
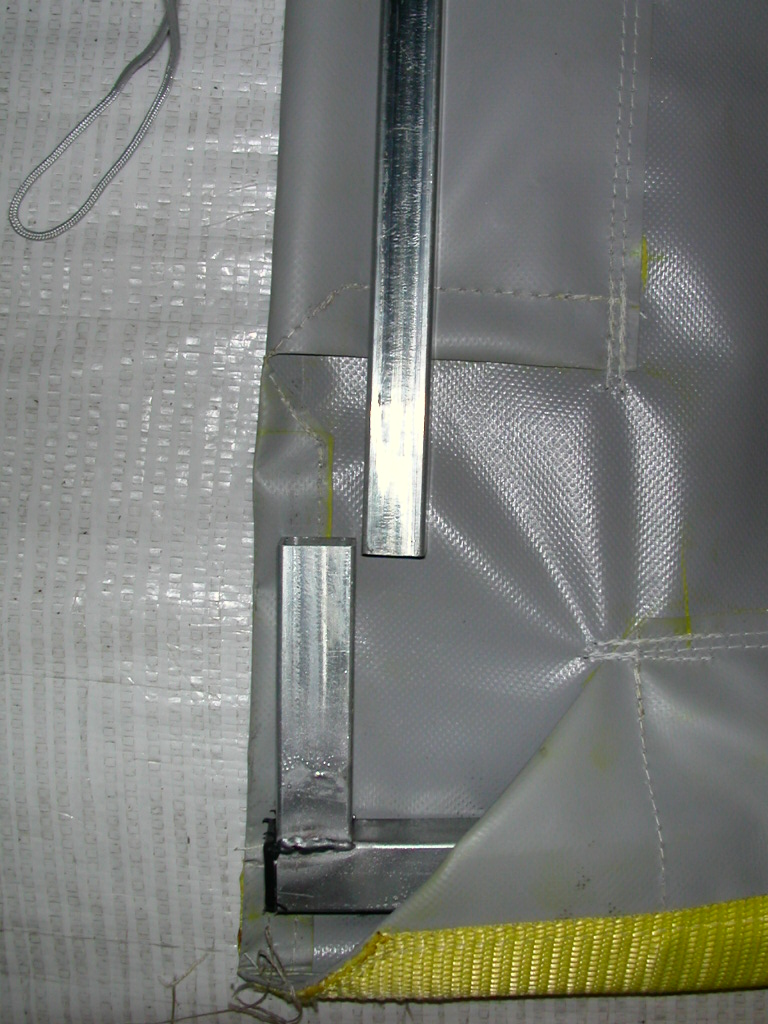
- Position the sewn horizontal pipe pocket that contains the steel tube
(with 5” long flanges at each end) across the bottom. Lay the (2) straight telescoping tubes
on each side after setting their lengths to about 3” less than the
interior trailer height and the other tube with flanges across the top.
|
|
14
|
- Insert the first telescoping pole into the pipe pocket on the right side
of the curtain pausing to thread it through the (2) separate web straps
at EACH of the pipe pocket cut-outs.
Then insert into or over the 5” flange on the bottom horizontal
tube. Make sure that the pole is
seated all the way into the 5” flanges to keep the curtain square.
|
|
15
|
- Standing at the top of the curtain insert the other telescoping vertical
pole into the pipe pocket on the left hand side of the curtain and
insure that it goes into or over the 5” flange that faces up on the left
side of the bottom cross tube.
|
|
16
|
- Insure that the E-clips on these straps are facing up off the floor with
the spring assembly located at the top of each clip.
|
|
17
|
- Slide the top horizontal tube’s 5” flanges into or over the top of the
left and right vertical poles simultaneously. Again make sure that both are seated
all the way into or over these 5” flanges.
|
|
18
|
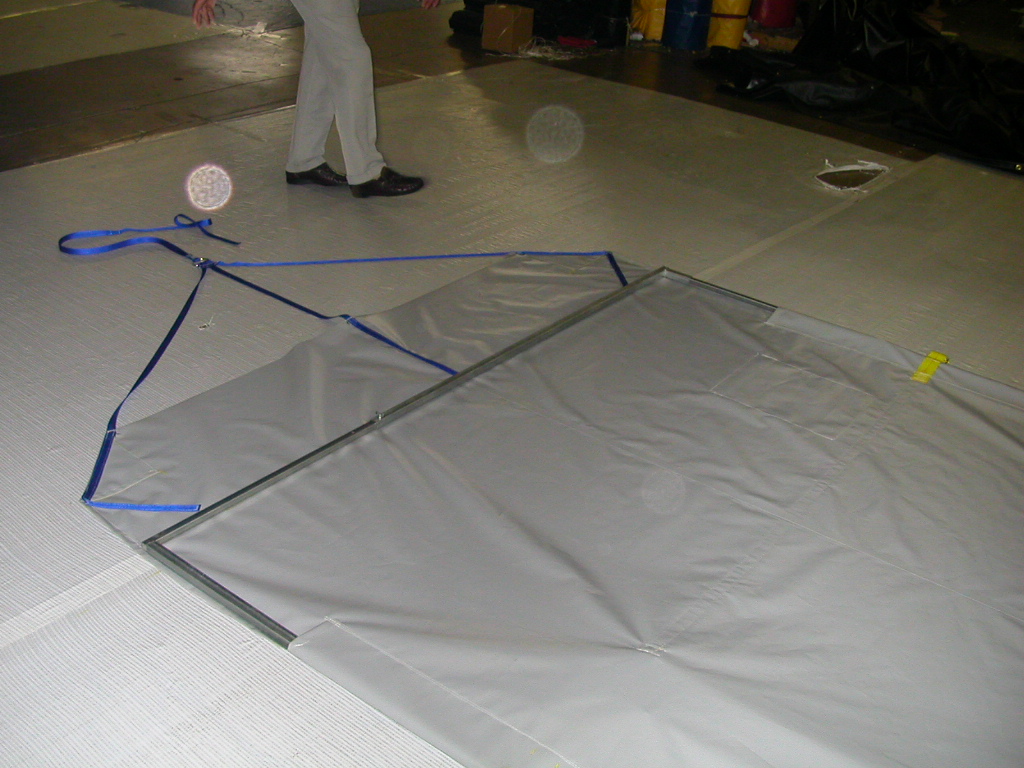
- Wrap the top of the curtain over the top horizontal tube and then thread
the blue 1” webbing strap from the welded D-ring through the ratchet.
|
|
19
|
- Tighten this ratchet to unitize the curtain assembly.
|
|
20
|
|
|
21
|
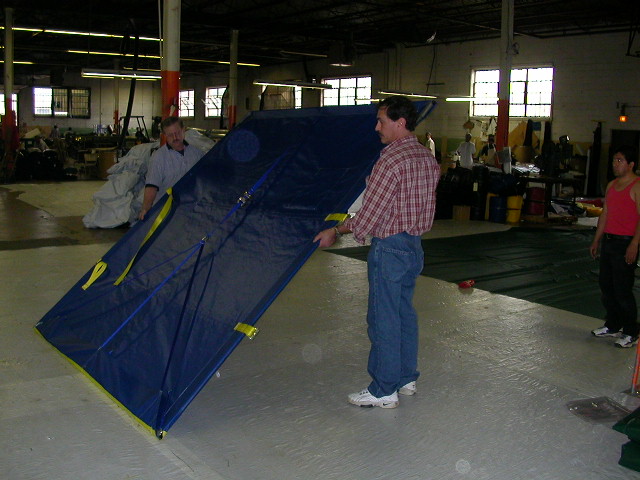
- Pick the assembled security curtain up on both sides and cant it at a 45
degree angle to fit through the rear door opening of the van/trailer.
|
|
22
|
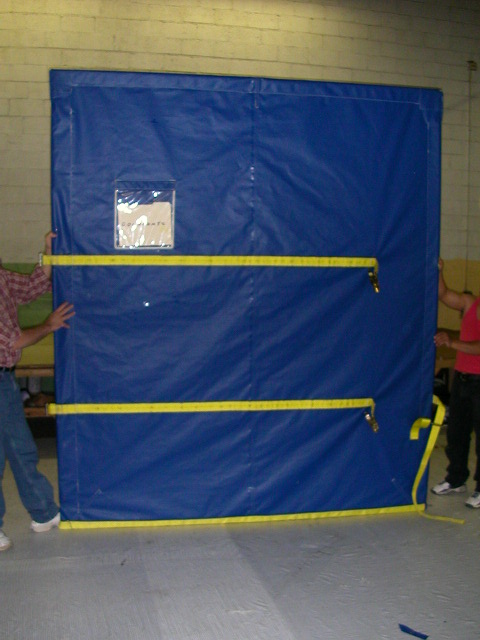
- Stand the curtain assembly upright and position the driver’s side at the
intended load demarcation point on the driver’s side van wall making
sure that the (2) large horizontal ratchet assemblies are on the back
side of the curtain that faces the tailgate and door.
|
|
23
|
- Secure the (2) driver’s side E-clips to the (2) horizontal E-tracks by
retracting the spring, inserting first the top and then the bottom of
the E-clip into the track; move clip down in track and release spring
clip to secure it.
|
|
24
|
- Position the curtain perpendicular to both walls and secure the (2)
E-clips into the E-tracks on the curbside of the van.
|
|
25
|
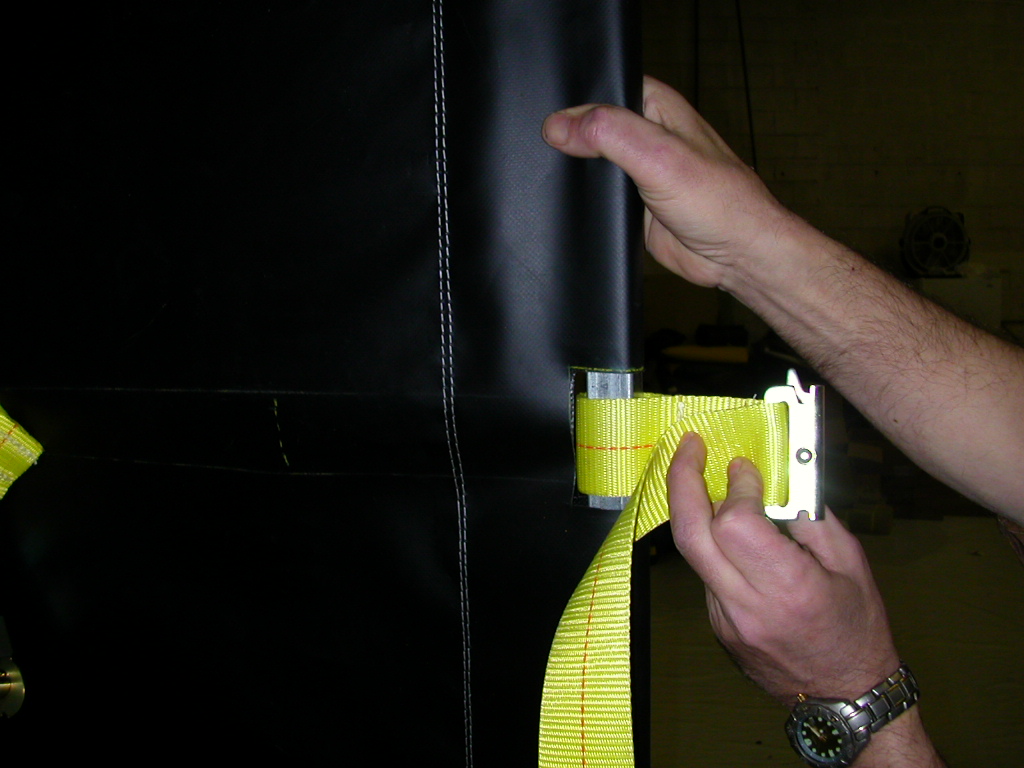
- Thread the webbing straps back through both large ratchets (which now
face the back of the van) and hand tighten.
|
|
26
|
- Crank the (2) ratchets tight to secure the curtain across the width of
the van’s interior.
|
|
27
|
- Install the USPS tamper seals through each ratchet handle and the
corresponding brass grommet located just under and to the left of each
ratchet handle assembly.
|
|
28
|
- To access the mail in the front of the trailer, break tamper seals, undo
ratchets, remove E Clips from track on curbside wall and swing curtain
towards rear door.
|
|
29
|
- When not in use swing curtain against driver side wall by hinging on E
Clips and secure E Track in either direction forwards toward front of
trailer or backwards toward door.
|
|
30
|
- When swinging curtain in either direction, always leave attached to
driver side wall and lift up on yellow webbing handles provided to avoid
abrasion to the webbing reinforcement on the bottom of the curtain when
scraped across floor.
|
|
31
|
- When curtain is secured across trailer preventing access to the mail,
place documents in the document holder located on the backside of
curtain with either a left-right or top-bottom orientation. Then secure Velcro flap at top to
closed position.
|

 Notes
Notes